One of my favorite aspects of throwing a big party is the theme. Once I have a theme to go by, I go crazy...no joke. I become somewhat obsessive/compulsive and can't stop the machine that is...Alyssa: Party Planner! I will be the first to admit that I do go a little overboard...but it is so much fun. The decorating really sets the mood for the party.
 Here is the "castle" entrance, all decked out with a red carpet and all.
 As you come in, two tall castle towers draw you into the living room where the day's first activities will take place. The towers were made with things I found around the house. I searched all over for something to make these with and almost gave up until one day when I was snooping down in the basement and I came across an old roll of linoleum flooring. Perfect. I cut it into 2 pieces and rolled them back up around some paint cans for stability. (the paint cans are inside the base of the towers). Then I strung the Christmas lights up and covered them with some gold curtain sheers I took down when I put in denim valances in the boys room. Glad I kept them, they came in handy. The cones on top were just made from tag board.
 Here is an over-head view of the "sparkle station" where the girls could get a glittery make-over. They could add sparkly decals on their nails, as well as polish and glittery body spray to top it off. (The tray is from the dollar store and the mirrors were on clearance at Michael's)
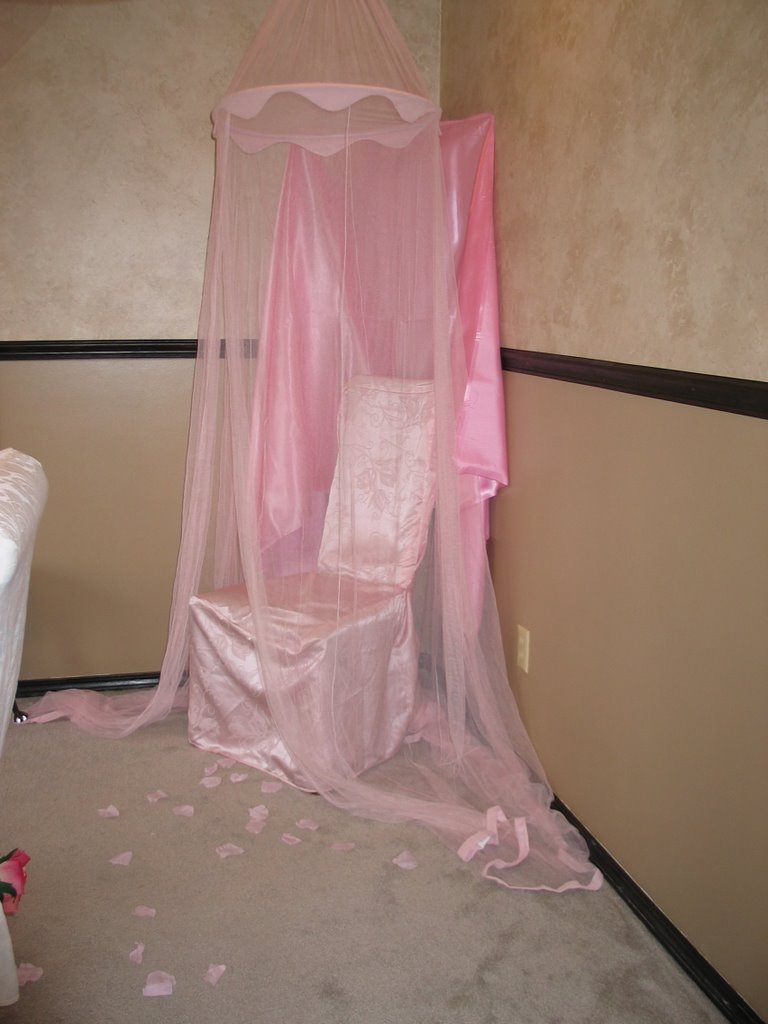 Here is Princess Natalie's birthday throne where we took photos of all the guests with the birthday girl. The canopy is from Natalie's bedroom and the chair is from my office. By the way, you can also see the new paint job I did in the dining room too.
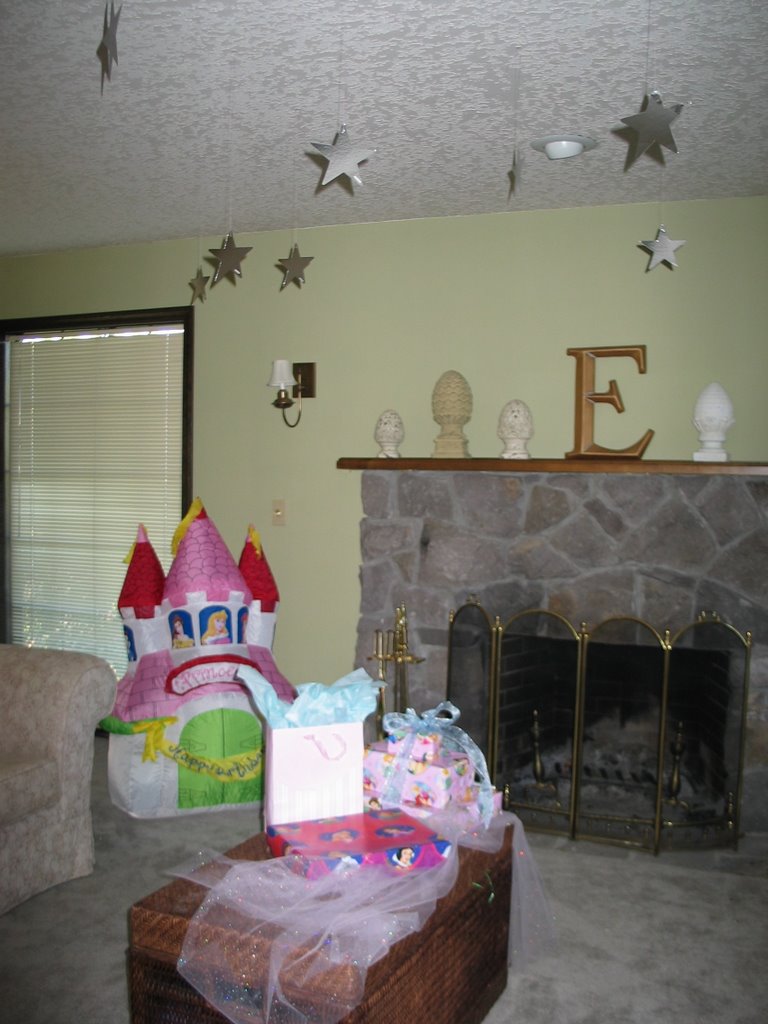 This is the living room where the gifts will be unwrapped. I love to hang things from the ceiling. It makes the room look so much more festive. I got that inflatable castle on clearance for about the same price as a large mylar balloon...it was a steal at 60% off.
 One of the most important areas to decorate is the space where they will be eating. I wanted to make this area feel magical and very girly. I used a large bed sheet for a table cloth and strung Christmas lights under the table cloth for a soft glow. I turned an ordinary looking dining room light into a chandelier by hanging a clear and lavender faux crystal Christmas garland from the arms of the light. Then to add a more elegant feel, I hung tulle garland swags from the ceiling.
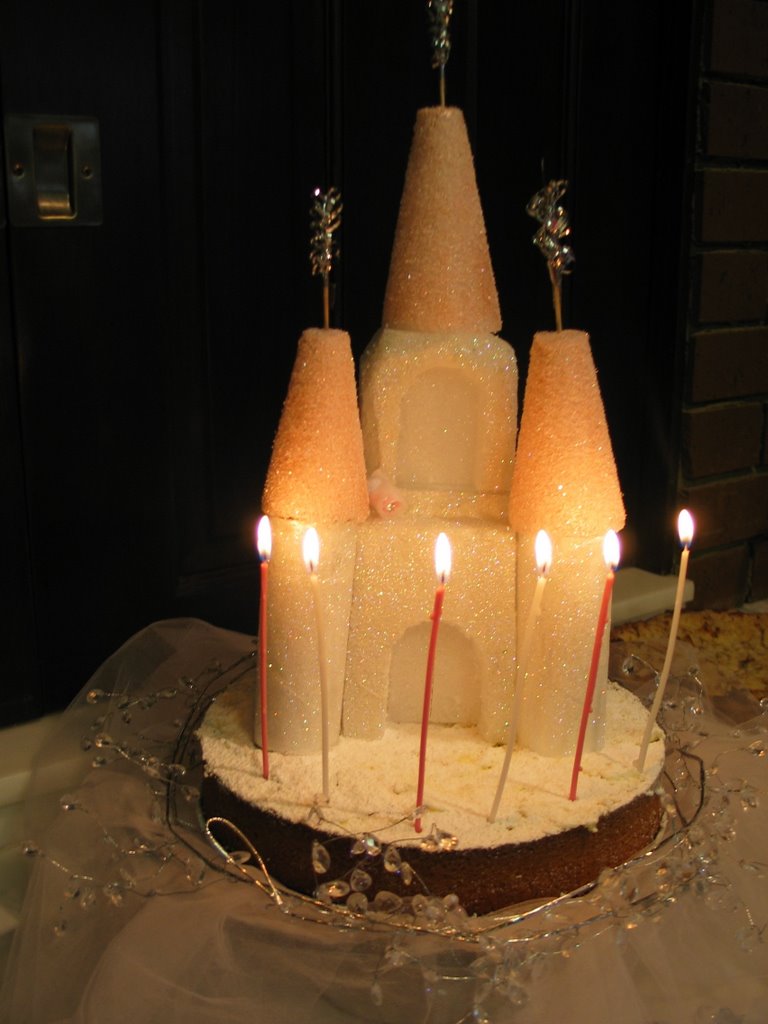 Every year I have made a themed cake. Now, I have no formal training in cake decorating, so usually I just wing it as best as I can. Some turn out better than others, but it's always a challenge. This year Natalie requested cheese cake, so I was stumped. I did a lot of visual research on google images (which is where I get some of the best ideas) and came up with about 20 great looking castle cakes, but I just couldn't figure out how to make it all come together. So, I did the next best thing...I made a castle cake topper out of styrofoam. I even carved out the bottom and put battery operated lights so the castle would glow. It turned out pretty good. I hope I don't regret not being up for the challenge of making a real cake, but I think this turned out just as pretty.
 For all the little girls (and my two boys) I made personalized mini cheesecakes topped with whipped cream. The names were piped out of melted candy melts onto parchment. Under the parchment I had printed out everyone's name in a simple font so it could serve as a pattern for me to follow when writing out their names.
3 comments:
This is so magazine worthy Alyssa! Great job!
BTW,
the paint job looks fantastic! You did it! That was a lot of hard work!
Way to go Alyssa. Such a lot of great ideas. I'm sure the kids had a fantastic time. You're such a cool mom. Andrea
Post a Comment